Standing in the shower, this is what you see. I was going to strip the door (which is the original one from the old bathroom) but I got half way through before realizing that its condition was extremely poor with lots of holes full of Polyfilla, so I filled, smoothed and painted it thus. A splash of colour is just the job. This room is now a whisker away from being finished, although I will have to refinish the top of the wash stand once the other bathroom is back in commission.
Friday, 19 November 2010
A View From the Shower
Standing in the shower, this is what you see. I was going to strip the door (which is the original one from the old bathroom) but I got half way through before realizing that its condition was extremely poor with lots of holes full of Polyfilla, so I filled, smoothed and painted it thus. A splash of colour is just the job. This room is now a whisker away from being finished, although I will have to refinish the top of the wash stand once the other bathroom is back in commission.Tuesday, 16 November 2010
Three Floors
Please don't be shy about sharing your opinions. These ideas are for the undressing room floor.


Backwards and Forwards
Having now finished the wardrobes, my priorities suddenly switched back to the en-suite (having originally planned to do the floor in the undressing room).
 The reason for this was that I discovered a pesky leak in the corner of the shower. This shower door cost a fortune and has been nothing but trouble. Its design is so unnecessarily complex that no matter how hard I try, water always seems to manage to find a way through eventually. Here, it was getting behind the door pivot and leaking through a crack in the grout behind, so I had to rip out the whole side. That's the second time I've had to do that, and I bally well intend not to have to bally well do it again. I also scraped out all the grout all the way around the bottom and started again with the best quality sanitary silicone money can buy.
 I also got on with finishing all the skirting, one of those jobs which I always seem to take forever to get around to. That results in a particularly warm glow of satisfaction when I finally do. I had to pull the khazi out to get at it, and I've thoughtfully blotted out the end of the soil pipe in case you are just having your breakfast.
 The end piece was carefully cut by hand and glued together.
 I cut a small piece of stone tile to fit between the skirting and the shower tray. When all the gaps were variously siliconed, grouted and caulked, it looked pretty tidy. I also had a small fillet to do on the other side to finish off that corner. Every possible gap is now permanently sealed. Now there's a bold statement if ever there was one.
Tuesday, 26 October 2010
The War (drobe) is Over...
...and I won!

Because the room is so titchy, I couldn't get a photo of the whole thing, so I assembled this from multiple images. What next? Wait and see.....
Tuesday, 19 October 2010
Tri-Fold Doors
 As usual its taking ages, but I'm nearly there now. I have installed a three panel folding door on the main wardrobe, and made the side panel. More soon....
Monday, 11 October 2010
Class 4 Shelves
 Of course I don't mean that these shelves aren't first class in every way, just that they were salvaged from Class 4 when they got new furniture up at the school where Janine works. They used to be for crayons and books and general school paraphernalia. Now, they look forward to a whole new life full of stylish knitwear and will probably provide support for some of the clobber visible here. That's recycling at its best.
Anyone who noticed that I've also put up architrave around the door gets a sweet.
Saturday, 9 October 2010
Coming Along
 This bit took several hours of patient whittling to match the profile of the ceiling.
 There it is at the top. It fits almost perfectly. Some more framework is also visible.
 And I made another shelf at the bottom, out of a left over bit of ply I found hanging about in the shed from when we did the kitchen nearly 8 years ago (still not finished). As luck would have it, it was almost exactly the right size.
Friday, 8 October 2010
A Man With a Plan
Loyal followers, I have come up with a plan for the construction of this wardrobe. I'm making the internal shelves and dividing piece into an integral part of the structure, instead of just assembling them inside it like I did on the other wardrobe.
 First, I cut the dividing wall (after wisely measuring it twice) and checked that it fitted.
 First, I cut the dividing wall (after wisely measuring it twice) and checked that it fitted.
 Then, with some help from my glamorous assistant J9 and a piece of batten, I got the divider and shelf together and firmly attached to the wall.
 Now, the rest of the structure and framework can be attached to the divider. It should be good and strong and not move.
Friday, 24 September 2010
The Other Side
 Starting work on the opposite wardrobe. As before, I need to build a frame from which to hang the doors. This one is much more complicated as it has a step in it where the door to the en-suite opens, and I also have a sloping ceiling to contend with which, as expected, does not slope evenly and is not level in any direction.
 More joinery is required too, this bit is where the whole thing steps in to allow the en-suite door to open. Right now, I am clueless as to the best way to go about this.
 Thursday, 23 September 2010
Undressing Room
A big thanks to Lou for coming up with yet another clever, witty and a little risque title for a part of our house. We like risque. The Love Shack, and now the Undressing Room. I knew we could rely on Lou, who comes up with stuff like the Cattic (an attic where her cats hang out). There's no stopping her.

I have installed rails in both halves, and stashed most of our camping stuff on the top shelf. That's about it for this side for the moment. I'm still using these as tool cupboards while I build the wardrobes on the opposite side, so J9 will have to wait a little longer before she can put all her ball gowns and big girls' blouses away.
Friday, 10 September 2010
A Wardrobe of Two Halves
 I made a bottom for the right half out of bits of T&G I had left over. Originally, I made it out of a piece of ply I had left over, but managed to cut it too small, and then there wasn't enough left to make it again. I must have forgotten to remember my brother Niels's wise words: "Measure twice, cut once."
 The major internal parts have been measured (twice) and cut (all fitted just right) and installed.
 On the left, a tall hanging area for ball gowns, wedding dresses etc. On the right, hanging for big girls' blouses (like Lewis Hamilton) with shelf space underneath. The large shelf at the top has no central divider so we can keep a small canoe on it (if we want to).
Thursday, 9 September 2010
Doors
 Once the frame was in place, it was time for the first trial fit of the doors. I got open louvre doors to allow air to circulate so our clothes don't go musty. I bought bi-fold track kits with totally incomprehensible instructions, but in spite of this, the first pair is up (although not fitting very well at this stage)
 Both pairs of doors are now fitted, and it is gratifying to see that my measuring for the gap was spot on. Wise words from my brother Niels: "Measure twice, cut once."
 This is how they will open, in two pairs folding flat against each other, taking up as little space as possible in what is a very small room.
Wednesday, 8 September 2010
Frame Up
Back inside the house, we're on the case with the fitted wardrobes in the bit between the master bedroom and the en-suite, which for want of something better to call it, I will refer to as the dressing room. (Please feel free to come up with something better, like Lou's now famous "Love Shack," which has been officially adopted.)
 First job is to bung in a bit of skirting and build the frame for the wardrobe doors to fix on to.
 Seen within the frame is one of the doors, and some other materials whose destiny will become clear later.
 Being as neither my joinery skills nor my toolbox was up to making really strong and tidy corner joints (which would inevitably get broken anyway during the fitting) some crude but effective engineering was employed.
 The main difficulty with all this was the fact that none of the walls was exactly flat or vertical, and the ceiling and floor were neither flat nor horizontal thus requiring much incremental shaving of all parts. In a length of a mere 1.6m, the floor drops over 40mm, and it curves like a banana too. The wood is level, the floor is not. Very not.
Tuesday, 7 September 2010
Chicken Run (it's done)
Let's drag you up to date with the chicken run.
 After putting in all the poles and planks along the bottom to prevent the chickens from chucking mud all over the paths, I wrapped the electric fence around, with some netting from an old trampoline around the top. I cleared the path all the way round, laid weed barriers and covered with gravel.
 A chicken's eye view: Looks like a palace to me.
Thanks to Rich for the use of his post shovel.
Friday, 3 September 2010
Arne's first Day

Nothing to do with the house, but here's Arne ready for his first day at secondary school. More on the house soon, I promise.
Friday, 9 July 2010
Chicken Run
Greetings! Much time has gone west lately with one thing and another, but lots of progress has also been made on the chicken run.
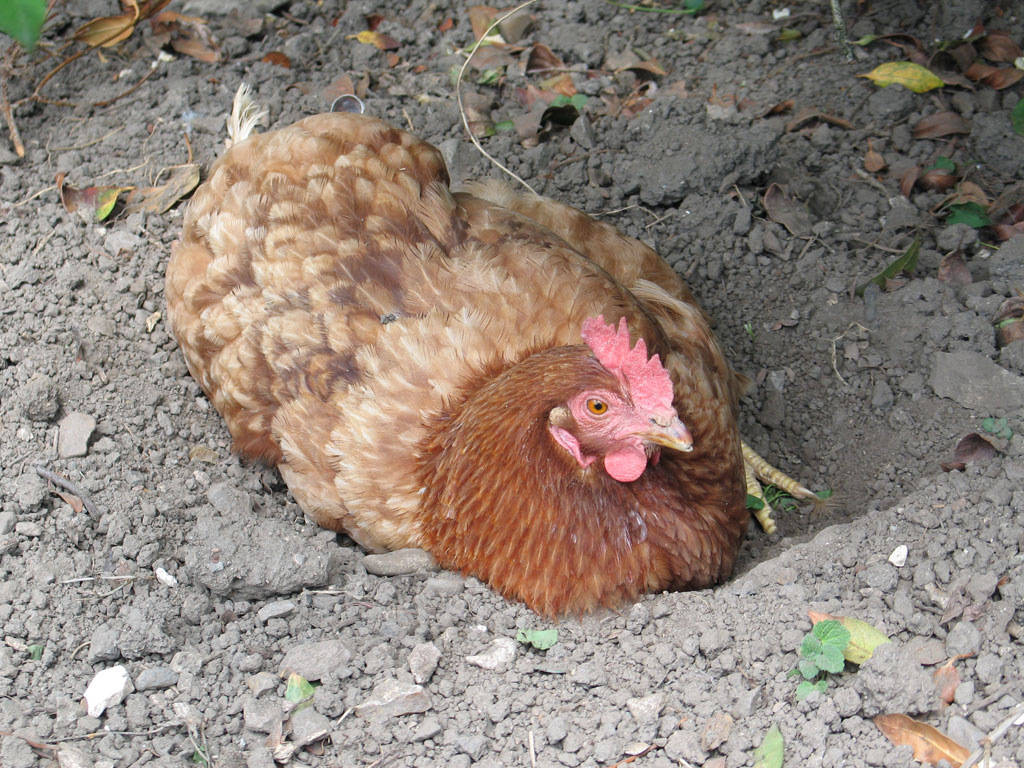 These blighters lay lovely eggs, but will also trash the greenhouse given half a chance, and make dust baths in the flower beds, as above.
 We need somewhere to lock them away when it suits our purposes, and it has been the plan for some considerable time to turn about a third of the top end of the garden where the vegetable beds are into a chicken run, fit for free-range pampered birds like ours.
 Its really starting to take shape now, with the surrounding paths dug out giving access all the way around, and covered with old carpet and cut-up dumpy bags as weed barriers. We have a ton of gravel coming on Monday to make the path. Planks have been screwed onto the posts to lessen the amount of soil the chickens chuck out onto our nice gravel paths.
Monday, 14 June 2010
Happy Saturday
This weekend Arne was away at cub camp. J9 and I got going in the garden. On Saturday, the weather was perfect for lying in a hamock, reading a good book and sipping something long and cool, or if that sounds a bit lazy, perhaps a bit of gardening in a bikini. As for me, I was digging and sweating, mostly.
 J9 was happy planting all her brassicas. Sorry about the rubbish picture, but the sun was so bright I couldn't see the screen on the camera.
 This bee was happy gathering pollen.
 And this Moth was particularly exuberant, performing aerobatics right over the garden!
Sunday, 6 June 2010
J9's Good Books
That's what I hope to be in when she sees this. Bet she can't wait to get planting when she gets home tomorrow.
 Despite my late night, I was up and at it early this morning, after my porridge and a quick fix of Thunderbirds on the plasma.
 Got the last dividing path finished, laid the last few slabs along the back, and made the final raised bed. Now for the chicken run.....
Led Astray
Last night round at Naughty Richard's house. That's Jock in the foreground, he knows every song by AC/DC. I managed, somehow, to escape without a hangover.


Saturday, 5 June 2010
Sweat and Dust
 Today was just about as sweaty and dusty as days come. I've got dust in my teeth and everywhere else.
 Got the fourth veg bed done though, and lots more bricks cleaned. I am now heading for the shower, and then off to be led astray by that naughty Richard.
Friday, 4 June 2010
Outdoors Again
Bit behind with my blogging again. I was working for a while on a Star Wars calendar, but have also been busy in the garden. I built a new compost bin because the old one was in the way of the chicken run I'm going to build.
 It is made partly from bits salvaged from the old one, and partly from mesh that I've been meaning to take down for ages, as it was both in the way and an eyesore. I was busy with my angle grinder lots. It just needs a lid now.
 In order to build the chicken run, I first needed to widen the path. For this, I had to clean up loads more bricks. I hate cleaning bricks.
 Here's the first fence post for the chicken run. Also, you can see I'm edging the path with some nice stones properly set into mortar. One day I'll think of a less labour-intensive way to do something.
 Mixing enough mortar to do this bit made me just about the dustiest, hottest, sweatiest dude this side of the Orion Nebula.
 All the dog could do was bask in the sunshine. J9 and AJ are away for a few days so I thought I'd better post my progress each day so they can see I'm not slacking and being led astray by that naughty Richard.
 This is he.
Subscribe to:
Posts (Atom)