Welcome back! I was busy at the drawing board from the end of September until mid-January but have since been working towards getting some more of the house finished. Feast your eyes...
Showing posts with label Dressing Room. Show all posts
Showing posts with label Dressing Room. Show all posts
Thursday, 1 March 2012
Dressing Room
All we needed in here was the carpet and the gaps under the wardrobes (caused by the sloping floor) covered with some wooden moldings. Difficult to get a decent picture due to the restricted space but you get the idea.

Those of you who are on the ball and have very long memories will notice that we have changed our minds about tiling the floor as we envisaged here.

Tuesday, 26 October 2010
The War (drobe) is Over...
...and I won!

Because the room is so titchy, I couldn't get a photo of the whole thing, so I assembled this from multiple images. What next? Wait and see.....
Monday, 11 October 2010
Class 4 Shelves
 Of course I don't mean that these shelves aren't first class in every way, just that they were salvaged from Class 4 when they got new furniture up at the school where Janine works. They used to be for crayons and books and general school paraphernalia. Now, they look forward to a whole new life full of stylish knitwear and will probably provide support for some of the clobber visible here. That's recycling at its best.
Anyone who noticed that I've also put up architrave around the door gets a sweet.
Saturday, 9 October 2010
Coming Along
 This bit took several hours of patient whittling to match the profile of the ceiling.
 There it is at the top. It fits almost perfectly. Some more framework is also visible.
 And I made another shelf at the bottom, out of a left over bit of ply I found hanging about in the shed from when we did the kitchen nearly 8 years ago (still not finished). As luck would have it, it was almost exactly the right size.
Friday, 8 October 2010
A Man With a Plan
Loyal followers, I have come up with a plan for the construction of this wardrobe. I'm making the internal shelves and dividing piece into an integral part of the structure, instead of just assembling them inside it like I did on the other wardrobe.
 First, I cut the dividing wall (after wisely measuring it twice) and checked that it fitted.
 First, I cut the dividing wall (after wisely measuring it twice) and checked that it fitted.
 Then, with some help from my glamorous assistant J9 and a piece of batten, I got the divider and shelf together and firmly attached to the wall.
 Now, the rest of the structure and framework can be attached to the divider. It should be good and strong and not move.
Friday, 24 September 2010
The Other Side
 Starting work on the opposite wardrobe. As before, I need to build a frame from which to hang the doors. This one is much more complicated as it has a step in it where the door to the en-suite opens, and I also have a sloping ceiling to contend with which, as expected, does not slope evenly and is not level in any direction.
 More joinery is required too, this bit is where the whole thing steps in to allow the en-suite door to open. Right now, I am clueless as to the best way to go about this.
 Thursday, 23 September 2010
Undressing Room
A big thanks to Lou for coming up with yet another clever, witty and a little risque title for a part of our house. We like risque. The Love Shack, and now the Undressing Room. I knew we could rely on Lou, who comes up with stuff like the Cattic (an attic where her cats hang out). There's no stopping her.

I have installed rails in both halves, and stashed most of our camping stuff on the top shelf. That's about it for this side for the moment. I'm still using these as tool cupboards while I build the wardrobes on the opposite side, so J9 will have to wait a little longer before she can put all her ball gowns and big girls' blouses away.
Friday, 10 September 2010
A Wardrobe of Two Halves
 I made a bottom for the right half out of bits of T&G I had left over. Originally, I made it out of a piece of ply I had left over, but managed to cut it too small, and then there wasn't enough left to make it again. I must have forgotten to remember my brother Niels's wise words: "Measure twice, cut once."
 The major internal parts have been measured (twice) and cut (all fitted just right) and installed.
 On the left, a tall hanging area for ball gowns, wedding dresses etc. On the right, hanging for big girls' blouses (like Lewis Hamilton) with shelf space underneath. The large shelf at the top has no central divider so we can keep a small canoe on it (if we want to).
Thursday, 9 September 2010
Doors
 Once the frame was in place, it was time for the first trial fit of the doors. I got open louvre doors to allow air to circulate so our clothes don't go musty. I bought bi-fold track kits with totally incomprehensible instructions, but in spite of this, the first pair is up (although not fitting very well at this stage)
 Both pairs of doors are now fitted, and it is gratifying to see that my measuring for the gap was spot on. Wise words from my brother Niels: "Measure twice, cut once."
 This is how they will open, in two pairs folding flat against each other, taking up as little space as possible in what is a very small room.
Wednesday, 8 September 2010
Frame Up
Back inside the house, we're on the case with the fitted wardrobes in the bit between the master bedroom and the en-suite, which for want of something better to call it, I will refer to as the dressing room. (Please feel free to come up with something better, like Lou's now famous "Love Shack," which has been officially adopted.)
 First job is to bung in a bit of skirting and build the frame for the wardrobe doors to fix on to.
 Seen within the frame is one of the doors, and some other materials whose destiny will become clear later.
 Being as neither my joinery skills nor my toolbox was up to making really strong and tidy corner joints (which would inevitably get broken anyway during the fitting) some crude but effective engineering was employed.
 The main difficulty with all this was the fact that none of the walls was exactly flat or vertical, and the ceiling and floor were neither flat nor horizontal thus requiring much incremental shaving of all parts. In a length of a mere 1.6m, the floor drops over 40mm, and it curves like a banana too. The wood is level, the floor is not. Very not.
Tuesday, 27 April 2010
Revelation 2: The Steps Down to the Dressing Room/EnSuite
Dear DIY fans. Remember this? I posted that almost exactly a year ago. I've been hard at work lately finishing it all off and doing some neat woodwork (borrowed Richard's router, thanks Rich) if I do say so myself.
 I spent a lot of time thinking about exactly how the hell I was going to make this tidy and finish it off.
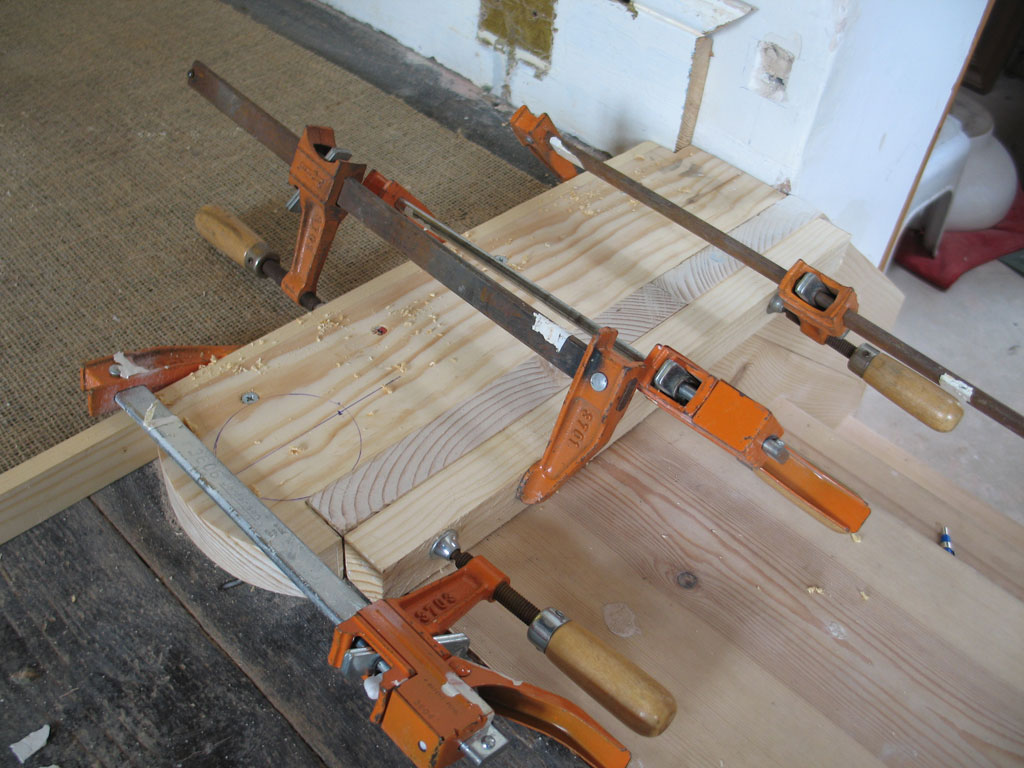 Our pal Tubs (real name Bartholomew, nicknamed Bathtubs, shortened to Tubs) made us a set of beautiful bespoke handrails to stop any drunkards falling down the steps late at night coming home from the pub. I had to work around them as we had them made long before the steps were finished. Here I made some pieces with curved ends for mounting the rails on, glued and clamped them to the steps and screwed to the floor. The skirting is fitted with a bevel cut at the end to fit a piece which will finish it off neatly.
 Another piece of wood is cut and moulded with Richard's router which will stick on top. The skirting this side is finished now.
 More bits of wood are moulded with the router and cut to trim the sides against the reveal, and some more trim is glued and clamped on to finish the bottom ends.
 We decided to paint it to match the skirting, as the wood had joins and bits of filler and grain going in funny directions because of the way the steps are made so it wouldn't have looked so great if we'd left the wood exposed.
 The carpet is down and the handrails are finally on. I fixed the wall where it broke up with some very strong render, and it seems to be holding.
 Here they are in all their glory. He's brilliant, is Tubs. He bent the twirly bits with his teeth.
Tuesday, 28 April 2009
7 week break!
I've been busy, that's the only excuse I'll offer. Most of the time I was otherwise engaged, but some progress has been made, not least of which was that both toilets were replaced due to their contents having a habit of leaking on the floor. Not ideal.
Well, I'm not about to go blasting you with half a million pictures of what's been happening, I'm going to feed it to you in tantalizingly small dribs and drabs. Starting off with a little series on the hole in the wall from the bedroom to the en-suite.

Going way back, you haven't seen the start of the en-suite yet. The opening through to the bedroom began with a few bricks knocked out and concrete lintels installed to support the wall. Sensibly, Richard had made some important notes and diagrams on exactly the bit of wall he was going to knock down.

This was the opening into the bedroom before Jack came and plastered the walls and ceiling.

The floor in the bedroom is a lot higher than the floor in the dressing room, which meant cutting a hole in the ceiling downstairs to make way for some steps.

Tricky Al made the steps. I left his money in an envelope behind the bar at the pub, so I hope he didn't drink it all. It was a squeeze making them fit, but fit they did.
Thursday, 12 February 2009
Hole in the wall
The last thing Rich did before he left on his away mission was make a large rectangular hole in our bedroom wall. The day before, Janine had asked me where the hole was going to be, so I drew it on the wall in pen. In completely the wrong place. And the next day (when I wasn't around) Richard came and for some strange reason thought I'd marked it accurately, and made a hole in the wrong place. You've got to laugh...

This was after he'd filled the wrong hole and made the right one.
 Through the hole, this is what you can see. A view through the dressing/wardrobe room into the en-suite shower room. As Rich was away we had Jack in for several days doing the plastering. He's very good. He helped lay the floor in the studio after I hurt my back.
Sunday, 14 December 2008
Sun pipe

Holding it delicately at arms length with his hat pulled tightly down over his eyes to protect him from the blinding light transmitted through the sun pipe from the roof, Richard thinks, "Now what do I do, I can't see a blooming thing...."
Subscribe to:
Comments (Atom)